Top 16 · #12 of 40 in Strategy
Scythe
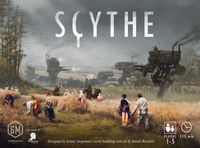
Set in an alternate 1920s Europe, this is a strategy game in which you take one of five factions (Crimean Khanate, Nordic Kingdoms, Republic of Polania, Rusviet Union, Saxony Empire) and use mechs and workers to gather resources and widen your territory. It is built so that quietly growing your economy and your holdings pays off better than fighting, which is why it is well known as "a war game where combat is rare." Each faction board has different abilities, so the mix of strategies changes every game.
Rules
Every top-row action on your Player Mat is bolted to the bottom-row action beneath it, and you may never pick the section you used on your previous turn. The first player to place a 6th star ends the game, but the winner is whoever ends with the most coins — and your popularity band decides the rate at which everything converts into them.
What makes this game this game
There are no rounds and no phases. On your turn you simply choose one of the four sections of your Player Mat, then take its top-row action and its bottom-row action, in that order — either, both, or neither.
The engine is a two-line restriction
You may not choose the section your action token was on during your previous turn. So every turn is really the question of which section you want to be free to use next. Exactly one faction breaks this rule — Rusviet — which is how you learn the rule exists.
| What is bolted together | What it means |
|---|---|
| Top-row action → bottom-row action | Resources gained from the top row can pay for the bottom-row action right there on the same turn |
| The four top-row actions sit in a different order on each mat | The four bottom-row actions (Upgrade, Deploy, Build, Enlist) are in the same order on every Player Mat, but which top-row action sits above each of them differs — and so do the costs and benefits |
| 6 stars → immediate end | The moment a 6th star is placed the game is over. But the winner is decided by coins, not stars |
| Popularity is a multiplier | It sets the rate at which stars, territories and resources convert into coins. One band up is worth dozens of coins in the same position |
- Only characters and mechs fight. Workers never fight each other.
- Winning as the attacker and forcing enemy workers to retreat costs you popularity. That single line is why a game covered in war art has so little combat in it.
- Faction Mats (special abilities) and Player Mats (action layouts) are shuffled and dealt separately, so the pairing is different every game.
Components
| Global components | Count | Notes |
|---|---|---|
| Game board | 1 | Triumph Track, Popularity Track, Power Track and the map of Eastern Europa |
| Player Mats | 5 | Each has a different top-row layout with its own costs and benefits |
| Faction Mats | 5 | Nordic (blue), Saxony (black), Polania (white), Crimea (yellow), Rusviet (red) |
| Combat cards (yellow) | 42 | Sixteen 2s, twelve 3s, eight 4s, six 5s |
| Objective cards (beige) | 23 | Each player starts with 2, kept secret |
| Encounter cards (green) | 28 | Three options per card; you must pick one |
| Factory cards (purple) | 12 | Only player count + 1 are used in a game |
| Power Dials | 2 | Combat is always between exactly two players |
| Resource tokens | 80 | 20 each of food, metal, wood and oil |
| Coins | 88 | The English 15th-printing rulebook lists 80 |
| Multiplier tokens | 12 | Stand in for resources with +3 and +7 when the supply runs short |
| Encounter tokens | 12 | Only 11 go on the board |
| Structure bonus tiles | 6 | Exactly one, drawn at random, is used per game |
| Riverwalk cards and quick-start cards | 5 each | Plus 1 quick-reference guide and 1 achievement sheet |
| Per faction | Count | Notes |
|---|---|---|
| Star tokens | 6 | Placing all six ends the game |
| Mech miniatures | 4 | Deploying one unlocks the ability printed beneath it |
| Character miniature | 1 | Only the character triggers encounters and takes a Factory card |
| Workers | 8 | Two start on the board, six sit on the Player Mat |
| Structure tokens | 4 | Armory, Monument, Mine, Mill |
| Recruit tokens | 4 | Each enlistment gives a one-time bonus and an ongoing bonus |
| Technology cubes | 6 | The cubes that the Upgrade action moves |
| Action, popularity and power tokens | 1 each | The action token is what remembers the section you just used |
Setup
- 1Shuffle the encounter, combat and objective cards and put each deck on its space on the board.
- 2Shuffle the Factory cards, deal one more than the number of players face-down onto the board, and return the rest to the box unseen.
- 3Draw one of the six structure bonus tiles at random and place it face-up at the bottom of the Popularity Track.
- 4Place one encounter token on every territory marked with an encounter symbol (11 in total).
- 5Put the resource tokens, coins and multiplier tokens beside the board as the supply.
- 6Shuffle the Faction Mats and the Player Mats separately and deal one of each per player. Seating runs clockwise from the top: Nordic, Rusviet, Crimea, Saxony, Polania.
- 7Take the starting power and combat cards shown on your Faction Mat, and the starting popularity, objective cards and coins shown on your Player Mat.
- 8Put your character on your home base and one worker on each of the two territories joined to it by land.
- 9Put 6 technology cubes on the green boxes with a black square, your 4 structures and 4 recruit tokens on their spaces, and your remaining 6 workers on the red rectangles above the Produce action. The action token sits beside the mat.
- 10The player with the lowest number on their Player Mat goes first; play proceeds clockwise.
Two banned pairings
Rusviet with the Industrial mat and Crimea with the Patriotic mat are not allowed. If you draw either, discard the Player Mat and randomly take another.
Taking a turn — the action token remembers
- 1Move your action token to a different section than the one it was on last turn. This part is never optional.
- 2Take that section's top-row action once (optional).
- 3Take that section's bottom-row action once (optional).
Cost first, benefit second
Red boxes are costs, green boxes are benefits. You must pay every currently exposed red box in full, then you may take as much or as little of the benefit as you like. You may only take each action once on your turn.
Rarely you may be unable to take any action at all (you took Move last turn and have no coins, resources, power or popularity). Then you take a dead turn: move the action token to another section and do nothing there. That is why the rulebook advises being thrifty with coins early on.
The four top-row actions
| Top-row action | Cost (starting position) | Benefit |
|---|---|---|
| Move | none | Move up to 2 different units one territory each / or gain $1 |
| Bolster | $1 | Gain 2 power / or draw 1 combat card |
| Trade | $1 | Gain any 2 resources onto a territory you control with a worker / or gain 1 popularity |
| Produce | every exposed red rectangle | Choose 2 different territories you control; every worker there produces 1 token |
| Terrain | What it produces |
|---|---|
| Mountain | Metal |
| Farm | Food |
| Tundra | Oil |
| Forest | Wood |
| Village | A worker (take the leftmost worker from your Player Mat) |
| Lake and Factory | Nothing |
- Move must use different units. You cannot move the same unit twice.
- Mechs may pick up and drop off any number of resources and workers while moving. Being carried does not count as the worker's movement, so that worker may still move on its own.
- If your character or mech enters a territory held only by enemy workers, its movement ends there and those workers retreat to their home base, leaving resources behind. You lose 1 popularity per worker you forced to retreat.
- Workers may not move into territories controlled by an opponent on their own.
- If your character enters a territory holding an encounter token, its Move action ends immediately.
The four bottom-row actions
| Bottom-row action | Resource | What it does |
|---|---|---|
| Upgrade | Oil | Take a technology cube from any green box and place it on an empty red box with bracketed borders |
| Deploy | Metal | Put a mech from your Faction Mat onto a territory you control with a worker, unlocking the ability beneath it |
| Build | Wood | Put a structure onto a territory you control with a worker (one per territory, never on a lake) |
| Enlist | Food | Move a recruit token onto an open one-time bonus space on your Faction Mat |
| Structure | Effect |
|---|---|
| Armory | Whenever you take the Trade action, also gain 1 power |
| Monument | Whenever you take the Bolster action, also gain 1 popularity |
| Mill | The Mill's territory counts as an extra territory for Produce, and the Mill itself produces as if it were a worker |
| Mine | Acts as a tunnel only you may use, even if an opponent controls the territory it sits on |
- Structures can never be destroyed or moved. If an opponent's unit enters the territory they take control of it, but you keep the structure's ability (the Mill's production is the exception — you must control that territory to use it).
- Deploying a mech gives the unlocked ability to your character and all your mechs. Workers never gain it.
- Enlisting gives both a one-time bonus (2 power, $2, 2 popularity or 2 combat cards, depending on the space you cover) and an ongoing bonus that triggers whenever you or the player to your immediate left or right takes that section's bottom-row action.
- Because of those ongoing bonuses you must announce your bottom-row action out loud.
- Most bottom-row actions also hand you coins. Even once you have nothing left to upgrade, you may keep paying the cost to take the coins and the ongoing bonus.
Combat is a blind bid
Combat happens once the Move action is completely finished, when your character or mechs share a territory with an opponent's character or mechs. It is resolved before your bottom-row action, and if several combats are pending the attacker chooses their order.
- 1Both players simultaneously and secretly set their Power Dials. You cannot choose more than you have on the Power Track, and never more than 7.
- 2Optionally, tuck one combat card per character or mech you have in this combat behind the dial (allowed even if you selected 0 power).
- 3Reveal at the same time. The higher total of dial plus combat cards wins. Ties go to the attacker.
- 4Both players pay the power they selected on the dial and discard any combat cards they used (cards are a temporary boost and never touch the Power Track).
- The winner takes the territory and every resource on it, and places a combat victory star (up to 2 of them; only Saxony is unlimited).
- The loser retreats every unit on that territory — mechs, character and workers — to their home base. Resources they were carrying stay behind for the winner.
- If the loser revealed at least 1 power, on the dial or through combat cards, they draw 1 combat card as they retreat.
- An attacker who wins loses 1 popularity per enemy worker forced to retreat. A defender who wins loses none.
- You may start a combat with 0 power and 0 popularity.
Encounters and the Factory
Only characters trigger encounters. When your character enters a territory with an encounter token its movement ends; once all movement and combat for the turn is done (and before any bottom-row action) you discard the token and draw an encounter card.
- Encounter rewards are isolated: you pay no extra costs, gain no extra benefits and trigger no Recruit Ongoing Bonuses.
- If an opponent's mech on that territory forced a combat, the encounter only happens after you win it.
- Polania's Meander is the one exception: it takes two options from a single encounter card, and the first option's benefit may pay for the second.
The Factory hands you a fifth section
The first time your character ends its movement on the Factory, you choose a Factory card and keep it. That card is a fifth section of your Player Mat, so alternating between it and a mat section sidesteps the no-repeat rule and lets you move every single turn. The first visitor chooses from player count + 1 cards; each later visitor sees one fewer. You may hold only one card, and the choice is permanent.
Factory card actions are entirely separate from your Player Mat. Even when they look similar they grant no Recruit Ongoing Bonuses, no structure bonuses and no coins. In exchange, every Factory card's bottom row is a special Move action: move one unit up to two times.
Faction abilities and mech abilities
| Faction | Ability | What it does |
|---|---|---|
| Rusviet | Relentless | You may choose the same section as your previous turn |
| Crimea | Coercion | Once per turn, spend 1 combat card as if it were any 1 resource |
| Nordic | Swim | Your workers may move across rivers (never onto lakes) |
| Polania | Meander | Pick up to 2 options per encounter card |
| Saxony | Dominate | No limit on stars from completing objectives or winning combat |
| Faction | Riverwalk terrain | Movement ability | Combat ability |
|---|---|---|---|
| Saxony | Forests and mountains | Underpass — mountains you control and all tunnels count as adjacent | Disarm — fighting on a tunnel or your Mine costs the opponent 2 power |
| Rusviet | Farms and villages | Township — villages you control and the Factory count as adjacent | People's Army — play 1 extra combat card if you have at least 1 worker there |
| Nordic | Forests and mountains | Seaworthy — move to and from lakes, and retreat onto an adjacent lake | Artillery — pay 1 power to make the opponent lose 2 power |
| Crimea | Farms and tundras | Wayfare — move to any inactive faction's home base, or your own, at any distance | Scout — steal one of the opponent's combat cards at random |
| Polania | Villages and mountains | Submerge — move to, from and between lakes as if they were tunnels | Camaraderie — you lose no popularity for forcing workers to retreat as the winning attacker |
Every faction has Speed
One of the four mechs is Speed for every faction: your character and mechs move one extra territory. Entering a territory with an opponent's unit still stops them dead. Tunnel-to-tunnel counts as one move, so Speed lets you add a territory before or after passing through a tunnel.
A mech ability is the one that was printed under the mech you deployed, so the order in which you deploy is the order in which abilities open. The unlocked ability goes to your character and every mech, never to workers — Nordic's Swim is a faction ability and is the exception that applies to workers alone.
Stars and the Triumph Track
A star is both the off switch and a score
The game ends the instant a 6th star is placed. Stars themselves convert into coins (3–5 each depending on your popularity band), but stacking stars while your popularity stays low drags the conversion of your territories and resources down with it.
You start with 2 objective cards but may only complete one (Saxony may complete both). You reveal it on your own turn, before or after a top- or bottom-row action, and you must meet every requirement at the moment you reveal it. The unused card goes back to the bottom of the deck.
End-game scoring — popularity sets the rate
| Popularity | Per star | Per territory | Per 2 resources |
|---|---|---|---|
| 0 – 6 | $3 | $2 | $1 |
| 7 – 12 | $4 | $3 | $2 |
| 13 – 18 | $5 | $4 | $3 |
| Scoring category | How it counts |
|---|---|
| Coins in hand | Everything you accumulated during the game, at face value |
| Every star placed | The per-star rate from the table above |
| Every territory controlled | Territories with your character, mech or worker, or with your structure and no enemy units. Lakes count; home bases are not territories |
| The Factory | Counts as 3 territories for whoever controls it at the end |
| Every 2 resources controlled | Counted in pairs; a leftover odd token is worth nothing |
| Structure bonus tile | Coins for how many of the tile's condition you achieved ($2, $4, $6, $9). You gain this even without controlling those territories |
What one band is worth
Two players with the same 6 stars, 10 territories and 12 resources score $44 at popularity 6 or below and $88 at popularity 13 or above. Against the rulebook's own remark that a typical winning fortune is around $75, two bands of popularity are the whole game.
All six structure bonus tiles use the same coin ladder ($2 → $4 → $6 → $9); only the thresholds differ. Tiles that count adjacent tunnels, lakes or encounters have four steps (lakes, for instance, run 1 / 2–3 / 4–5 / 6–7). The tile counting structures built on tunnels has only three steps (1 / 2 / 3–4), capping it at $6. The tiles for structures in a row and for structures on farms and tundras run 1 / 2 / 3 / 4.
Game end and tiebreakers
The game ends immediately when a player places their 6th star token, even if that player still had things they could do on that turn.
- If the 6th star comes from a bottom-row action, take the benefit, the coins and the Recruit Ongoing Bonus first, then place the star.
- If a Move action left your units sharing a territory with an opponent's units and the combat can no longer happen, undo that part of the move and return the units to where they came from.
- If a Recruit Ongoing Bonus on an opponent's turn would give you a popularity or power star, it is resolved after that opponent finishes their action, in clockwise order. If a 6th star lands there, the game ends at once.
| Tiebreaker order | Category |
|---|---|
| 1 | Number of workers, mechs and structures |
| 2 | Power |
| 3 | Popularity |
| 4 | Number of resource tokens controlled |
| 5 | Number of territories controlled |
| 6 | Number of star tokens placed |
Run a sample scoring round in your first game
The rulebook recommends it: when anyone places their first star, pause and have everyone work out what they would score right now. It does not count for anything — it is how you learn what the popularity multiplier actually does.
Strategy that falls straight out of the rules
- Look at popularity first. The 1 popularity from Trade and the Monument (1 popularity every time you Bolster) look small, but they lift all three scoring categories at the end.
- Attacking costs popularity. Winning as the attacker burns 1 popularity per enemy worker you push off. A territory crowded with enemy workers is expensive to take, which is exactly what makes workers a wall.
- A Factory card changes your tempo. It is a fifth section, so alternating it with a Move section lets you move every turn. The earlier you arrive, the more cards you get to choose from.
- Upgrading pays twice. Taking a cube out of a green box raises a top-row benefit, and putting it on a red box lowers a bottom-row cost. Doing it six times is also a star.
- Eight workers are not free. Every worker you produce uncovers more of the Produce cost, so power, popularity and coins bleed out on every Produce. Chase that star only if your income can carry the overhead.
- More power does not mean winning. Your opponent does not know how much you will spend or how many combat cards you tucked in. Combat cards are worth nothing at the end, so there is no reason to hoard them.
- Read the mat pairing. The bottom row is in a fixed order and only the top row moves, so the question of the game is which top-row action happens to sit above the bottom-row action you plan to use most.
Expansions and other versions
| Product | Year | What it adds |
|---|---|---|
| Invaders from Afar | 2016 | The Albion and Togawa factions — up to 7 players |
| The Wind Gambit | 2017 | An airship module and a variable game-end module |
| The Rise of Fenris | 2018 | An eight-episode campaign plus 11 modules you can mix freely. It is not a legacy game — you can replay the campaign from the start |
| Modular Board | — | A map assembled from tiles (English only) |
| Automa | — | The solo variant, with a simulated opponent |
- Korea Boardgames publishes Korean rulebooks for all three expansions (we read the 8-page Invaders from Afar, the 52-page Rise of Fenris and the 12-page Automa rules).
- My Little Scythe is a separate game. It borrows the setting for a family game; it is not a smaller version of these rules.
- There is a digital edition, and a standalone follow-up called Expeditions (2023) that shares the world but not the rules.
- This guide covers the base game only. Expansions change the faction count, the end conditions and the module rules.
Rules people get wrong
Q. Can I really never reuse the section I just used?
Never, with one exception: Rusviet's Relentless. But once you hold a Factory card it becomes a fifth section, so alternating between the Factory card and a mat section lets you effectively repeat the same action every turn.
Q. Can I take only the top-row action and skip the bottom one?
Yes. Top only, bottom only, both or neither are all legal. What you may never skip is moving the action token to a different section. If you take both, the top row always comes first.
Q. Is it combat when my mech enters a territory holding enemy workers?
No. Combat only ever happens between characters and mechs. Enemy workers retreat to their home base leaving their resources behind, and you lose 1 popularity per worker you forced out.
Q. Does placing six stars first mean I win?
No. The 6th star is only the end trigger; the winner is whoever has the most coins. Filling your track with combat stars while your popularity sits at the bottom can nearly halve what the same stars, territories and resources are worth.
Q. What happens to an odd resource token?
Resources are scored in pairs only and a leftover token is worth nothing. Per the rulebook's own example, 13 resources at 10 popularity is six pairs, so $12.
Q. How many territories is the Factory worth?
Three, to whoever controls it at the end of the game. In exchange the Factory produces no resources during play.
Q. Can I complete both of my objective cards?
Only one (Saxony's Dominate allows both). You reveal it on your own turn and must meet every requirement at that moment — if you complete an objective and wait, you have to still meet it when you reveal.
Q. What if an opponent's unit stands on a territory with my structure?
They take control of the territory, but the structure's ability is still yours and they can never use it. The single exception is the Mill: you cannot produce with it on a territory you do not control.
History and editions
- Designed by Jamey Stegmaier, with art and world building by Jakub Rozalski from his 1920+ series. The paintings of mechs standing in farmland came first; the game followed.
- Funded on Kickstarter in 2015 and released in 2016.
- It took four 2016 Golden Geek Awards — game of the year, artwork and presentation, strategy game and solo game — and the expansions The Wind Gambit (2017) and The Rise of Fenris (2018) each won best expansion (cross-checked against Wikipedia).
- The Korean edition is published by Korea Boardgames, which holds exclusive Korean rights under contract with Stonemaier — confirmed from the copyright page of the 2021 Korean rulebook, which also carries a Korean title of its own rather than a transliteration.
- The designer's note in the rulebook explains the title: a scythe is both a farming tool and a weapon. The design of a war game where fighting is rare comes straight out of that sentence.
Which printings this guide read
The English 15th printing, r24 (32 pages) and the Korean edition rulebook from Korea Boardgames (32 pages). The two genuinely disagree in places, recorded above under the rulebook cross-check — most sharply on whether Rusviet's Relentless applies to a Factory card.
Sources
Official Stonemaier Games rulebook (English, 15th printing r24, 32 pages)Official Korean edition rulebook, published by Korea Boardgames (32 pages)Official Korean Automa (solo variant) rules, published by Korea Boardgames (12 pages)Stonemaier Games official rules page (where the rulebooks and reference guides are distributed)BoardGameGeek — ScytheCross-checked against Wikipedia: Scythe (board game)Cross-checked against Namuwiki: Scythe (Korean)Rule summaries are reference content written by us, not quotations from the official rulebook. Always check the official rulebook for exact rules. Diagrams are original schematics, not rulebook illustrations.
Spotted a mistake? Tell us in the comments below →
Last updated 2026-09-14
💡 Master tip
Rather than chasing points through combat, it is safer to hold your popularity up and quietly build territory and resources, and to keep checking how fast the other players are collecting stars. Build your base with top-row actions alone early on, and from the midgame, as resources pile up, the key is finding the column that lets you use the top and bottom rows together efficiently.
Similar games
Ready for something heavier
If this one has gotten too easy, try these — same feel, one step up in weight.
Comments
Share your thoughts, report a mistake, or request a tool. No sign-in needed — nicknames are not verified, so anyone can use the same one.
Loading…