Top 22 · #17 of 40 in Strategy
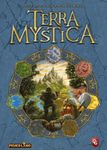
Terra Mystica
Take one of 14 different fantasy factions, terraform land into your own faction's terrain, and build structures to expand your power in this heavy euro game.
Rules
Each player takes one of 14 fantasy factions, terraforming land so only their own kind can live there, then building on top of it across six rounds. The distinctive twist is that building next to an opponent charges their power — the heart of the game's strategy.
What makes this game its own thing
The title says it all. Only one of the seven terrain types is habitable to your faction, and every other terrain must be terraformed before you can build on it. The cost is paid in Spades, set by how far the target terrain sits from your home terrain.
The second axis is Power. Power tokens are never destroyed; they move through Bowl I → II → III, and only the tokens in Bowl III can be spent. More striking still: when an opponent builds next to you, you gain Power — though not for free, since you pay Victory points for it.
Adjacency is a trade, not an attack
When someone builds a new Structure next to yours, you choose whether to pay Victory points and charge Power. There is no attack or defense — only distance matters — so building near an opponent is not purely a disadvantage; it can even halve the cost of upgrading to a Trading house.
- The game is exactly six rounds. A different scoring tile is active each round, so the same action is worth a different amount depending on when you take it.
- There is almost no luck. No dice, no card draws. Randomness is limited to the initial layout of bonus cards, favor tiles, and scoring tiles.
- The 14 factions are asymmetric. Starting resources, starting Victory points, and special abilities all differ, but this guide focuses on the shared rules and does not cover each faction's individual abilities — read your own faction board for those.
Components
| Component | Count | Notes |
|---|---|---|
| Game board | 1 | A map of seven terrain types in hexagonal spaces plus river spaces |
| Faction boards | 7 (double-sided) | A different faction on each side — hence 14 factions |
| Cult board | 1 | Four tracks (Fire, Water, Earth, Air), each with spaces 0–10 |
| Terrain tiles | 56 (double-sided) | 8 of each of the 7 terrain types |
| Structures (per faction color) | 8 Dwellings · 4 Trading houses · 1 Stronghold/Sanctuary · 3 Temples | Structures only move forward from Dwelling, never backward |
| Priests / Markers / Bridges | 7 / 7 / 3 | Priests are spent only on Cult tracks; Bridges connect across rivers |
| Workers / Coins / Power tokens | 65 / 85 (mixed 1/2/5) / 65 | Power tokens are generic and drawn from the shared supply |
| Favor tiles | 28 | 4 Cults × (one +3 tile plus three ability tiles) |
| Bonus cards / Town tiles | 10 / 14 | Bonus cards rotate every round; Town tiles are taken once per founded Town |
| Scoring tiles / Action tokens | 9 (6 used) / 17 | Scoring tiles set the per-round bonus Victory point conditions |
Structures only flow one way
Every Structure passes through Dwelling → Trading house, then splits into Stronghold or Temple. A Temple can be upgraded once more to a Sanctuary, but the Stronghold is itself a dead end. Built Structures can never be torn down or reverted.
Setup
- 1Place the game board and Cult board in the middle. For your first game, use the recommended factions — Witches (green) and Nomads (yellow) for 2 players, add Alchemists (black) for 3, add Halflings (brown) and Mermaids (blue) for 4, add Giants (red) for 5.
- 2Each player takes their color's tokens (Structures, 7 Priests, 3 Bridges, 7 Markers) and collects the starting Workers, Coins, and Priests shown on their faction board.
- 3Move the Cult board markers up by the amount shown on your faction board, then distribute your 12 Power tokens between Bowl I and II as instructed on your faction board (Bowl III starts empty).
- 4Starting with the first player and going clockwise, each player places one Dwelling on their home terrain. Then, starting with the last player and going counterclockwise, place a second Dwelling (Nomads place a third after everyone places their second; Chaos Magicians place only one, after everyone else has placed all of theirs).
- 5Shuffle the 6 round scoring tiles into order, then cover the right half of the round 6 tile with the Game end token. Draw only player count + 5 Bonus cards (5 for 2 players, 6 for 3, 7 for 4, 8 for 5) and lay them out.
- 6Lay out the 12 Favor tiles in a 3×4 pattern, and set out the 14 Town tiles and the Action tokens.
- 7Starting with the last player and going counterclockwise, each player picks one Bonus card. Place your Victory point marker at the starting value shown on your faction board.
- **Gain** — if Bowl I has tokens, move one from I to II; if not, move one from II to III
- **Spend** — spending a token in Bowl III sends it back to Bowl I
- **Once both I and II are empty**, no further Power can be gained — any remainder is lost
The three phases of a round
- 1Phase I — Income. Collect Workers equal to your visible Dwelling track, Coins from your Trading house track, and Priests from your Temple track (a Sanctuary gives 2 more). The Stronghold usually gives extra Power. Add any income from Bonus cards and Favor tiles.
- 2Phase II — Actions. Starting with the first player and going clockwise, each player takes exactly one Action per turn. A player who passes takes no more turns this round. The phase ends once everyone has passed.
- 3Phase III — Cult bonuses and clean-up. Every player whose Cult track position qualifies receives this round's Cult bonus. Clear Action tokens, return and reselect Bonus cards, then discard this round's scoring tile. After round 6 there is no clean-up — final scoring begins immediately.
| Action (one per turn) | Cost | Key point |
|---|---|---|
| 1. Transform & Build | Spades (by cycle distance) + 1 Worker, 2 Coins | Must be empty, adjacent to your Structures, and your terrain |
| 2. Advance Shipping | 1 Priest + 4 Coins | Extends indirect adjacency across river spaces |
| 3. Lower Exchange rate | Cost shown on faction board | Spades get cheaper, from 3 Workers down to 1. One-time +6 VP |
| 4. Upgrade a Structure | Varies by Structure | Raises Power value; Temples and Sanctuaries grant a Favor tile |
| 5. Send a Priest to a Cult | 1 Priest (permanently spent) | Advances a Cult track by 3 or 2 spaces |
| 6. Power actions (6 kinds) | 3, 4, 4, 4, 6, or 6 Power | Bridge, Priest, Workers, 1 Spade, 7 Coins, or 2 Spades — each once per round |
| 7. Special actions | Usually free | Unique actions from your faction, Favor tiles, or Bonus cards — once per round |
| 8. Pass | — | Return and swap your Bonus card and become a candidate for next round's starting player |
Conversions are not your turn
5 Power → 1 Priest, 3 Power → 1 Worker, 1 Power → 1 Coin, and converting a Priest to a Worker or a Worker to a Coin can all be done any number of times before or after your Action. None of them counts as your turn.
Terraforming — reading the transformation cycle
The seven terrain types form a ring. Transforming to a neighboring terrain costs 1 Spade, and the cost rises by 1 per step, up to 3 Spades for the farthest terrain. This order and cost are printed identically on every faction board, just rotated so your home terrain sits at the top.
| How to get Spades | Cost |
|---|---|
| Exchange Workers (Action #3 can lower the rate) | Starts at 3 Workers = 1 Spade |
| Power action — 1 Spade | 4 Power |
| Power action — 2 Spades | 6 Power |
| One Bonus card | 1 Spade (as fixed income) |
Spades are spent immediately
Spades cannot be saved. They must all be applied to one space within the Action that granted them. You do not have to build a Dwelling right away after transforming, but the transformed space still needs to be adjacent to one of your Structures. You also don't have to transform all the way to your home terrain — you can stop partway.
Power Bowls and adjacency charging — the trickiest rule
Your 12 Power tokens are never destroyed — they cycle through Bowl I, II, and III. Only tokens in Bowl III can be spent, and spending returns them to Bowl I. Gaining Power doesn't create new tokens — it moves existing ones from I to II, or II to III.
The most common way to gain Power is when an opponent builds or upgrades a Structure adjacent to yours. The maximum you may gain equals the combined Power value of your adjacent Structures (Dwelling 1, Trading house/Temple 2, Stronghold/Sanctuary 3).
| Power gained | VP you pay |
|---|---|
| 1 | 0 |
| 2 | 1 |
| 3 | 2 |
| 4 | 3 |
The VP cost is real, but you can decline
Gaining N Power costs N−1 Victory points. Your score can never go negative — you may always choose to gain less. You never gain Power from your own Structures — only an opponent's building or upgrading triggers it.
The Structure upgrade chain
Only a Dwelling can be placed on an empty space. Everything else replaces an existing Structure, one step per turn. Every Dwelling passes through Trading house, which then splits toward Stronghold or Temple.
A Trading house is nearly half price with a neighbor
Upgrading a Dwelling to a Trading house costs 3 Coins instead of 6 if any opponent Structure sits adjacent. Stronghold and Sanctuary costs vary by faction, so this guide does not fix a number for them — check your own faction board.
- Every Temple or Sanctuary upgrade grants one Favor tile. Favor tiles immediately advance a Cult track or unlock a permanent special ability. You may only hold one of each type.
- If the current scoring tile highlights a Structure, building or upgrading it grants bonus Victory points (for example: 2 VP for a Dwelling, 3 for a Trading house, 5 for a Temple, 5 for a Stronghold or Sanctuary — these vary by round).
Cult tracks and Towns
The four Cult tracks (Fire, Water, Earth, Air) each run from 0 to 10. Permanently spending one Priest advances a track by 3 or 2 spaces (as shown on the track), and that Priest never returns. Crossing or landing on spaces 3, 5, 7, or 10 grants 1, 2, or 3 Power.
Reaching space 10 requires a key earned by founding a Town, and only one player per track may occupy space 10. A Town is founded automatically once at least 4 of your Structures (3 if a Sanctuary is among them) sit adjacent to one another with a combined Power value of at least 7. You then take a Town tile for Victory points, resources, Cult advancement, and one key.
Cult progress pays twice
Beyond the immediate Power gained while advancing, your final position on each track scores Victory points at game end (see Scoring below). Many Favor tiles granted by Temples and Sanctuaries advance Cult tracks directly, so Structure upgrades and Cult progress reinforce each other.
Final scoring
- 1Cult scoring. Each track awards 8 VP for 1st place, 4 for 2nd, and 2 for 3rd. Tied players split the combined VP of their tied ranks evenly, rounded down. A player left at space 0 scores nothing.
- 2Area scoring. Count your largest connected network of Structures, including indirect adjacency across rivers your Shipping value can cover. 1st place gets 18 VP, 2nd gets 12, 3rd gets 6; ties split the same way.
- 3Resource scoring. Leftover Coins are worth 1 VP per 3. Workers, Priests, and Power convert to Coins first at their exchange rates (Worker→Coin 1:1, Priest→Worker 1:1, Power→Coin 1:1) before this count.
| Category | 1st | 2nd | 3rd |
|---|---|---|---|
| Each Cult track (×4) | 8 VP | 4 VP | 2 VP |
| Area (connected Structures) | 18 VP | 12 VP | 6 VP |
Highest total wins
After every category is totaled, the highest Victory point total wins. A tie is a shared win — there is no further tiebreaker.
When the game ends
The game runs for exactly six rounds. Once every player has passed in the final round's Action phase, there is no Cult bonus or clean-up for that round — final scoring begins immediately. There is no early-ending or sudden-death condition; all six rounds are always played.
Each later round does less
Spades, Cult progress, and Structure upgrades are all limited by resources and turns taken, so your existing land and Cult position matter more as rounds pass. Early on, building somewhat close to an opponent tends to keep resources flowing better than total isolation.
Strategy tips
- Total isolation earns neither Power nor Trading house discounts. As the rulebook's central dilemma implies, settling reasonably close to an opponent usually keeps your resources flowing.
- Upgrade to Temple and Sanctuary early. Favor tiles received sooner let you push Cult tracks further, and Cult scoring is a large share of the final total.
- Always check the current scoring tile. The same building or terraforming action can be worth 2 to 5 more Victory points depending on the round.
- Priests never come back. Whether to spend them on Cult tracks or keep collecting them from Temple income is a choice that matters through the whole game.
Player count, editions, and expansions
| Player count | Difference |
|---|---|
| 2 players | Recommended factions are Witches and Nomads. More open board space slows down the terraforming race |
| 3–5 players | More sectors are used as player count rises, and adjacency interactions (Power gains) happen more often |
- Fire & Ice (2014 expansion) — adds 6 new factions and 2 new terrain types. The Korean edition was released as a big box bundling this expansion with the base game.
- Merchants of the Seas (2019 expansion) — adds Shipyard structures and new trading rules.
- Age of Innovation (2023) — a new installment in the Terra Mystica series, but a separate standalone game. Its terrain, Power, and Structure rules do not directly carry over from this guide.
Frequently confused rules
Q. Do I gain Power from my own Structures?
No. Power only responds to other players' building and upgrading. Your own Structures never charge each other.
Q. Can I save up Spades and use them later?
No. Spades must be spent immediately within the Action that granted them and cannot be stored. You don't have to build a Dwelling right away after transforming, but that space still needs to be adjacent to one of your Structures.
Q. If both Bowl I and II are empty, can I still gain Power?
No. Once both are empty, no further Power can be gained that time — only tokens already in Bowl III are spendable Power.
Q. Can I have both a Stronghold and a Temple?
Yes. From the Trading house, Stronghold and Temple are separate branches. You may only choose Stronghold once, but you may build up to 3 Temples, one of which can be upgraded further to a Sanctuary.
Q. Can anyone reach space 10 on a Cult track?
No. Only one player per track may occupy space 10, and doing so requires a key earned by founding a Town. Without a key, you stop at space 9.
Q. Can the game end early?
No. There is no early-ending condition. All six rounds are always played before final scoring.
Editions and history
Designed by Helge Ostertag and Jens Drögemüller, the game was first published in Germany by Feuerland Spiele in 2012. It won the 2013 Deutscher Spiele Preis (1st place) and the International Gamers Award for multiplayer strategy games, among several other international honors.
The Korean edition was released by Korea Boardgames as a crowdfunded big box in March 2015, bundling the base game with the Fire & Ice expansion (cross-checked against Namuwiki, 2026-10-10). Capstone Games later took over distribution of the English edition, which is the current printing in circulation.
Official expansions include Fire & Ice (2014) and Merchants of the Seas (2019), alongside a mobile app and a Steam release. A standalone successor set in the same world, Age of Innovation, followed in 2023. The Power Bowl and adjacency-charging mechanism later carried over into the science fiction successor, Gaia Project.
Sources
Official Feuerland Spiele / Capstone Games rulebook v3.0 (20 pages)Wiki cross-check — English Wikipedia: Terra MysticaWiki cross-check — Namuwiki: Terra Mystica (Korean)Rule summaries are reference content written by us, not quotations from the official rulebook. Always check the official rulebook for exact rules. Diagrams are original schematics, not rulebook illustrations.
Spotted a mistake? Tell us in the comments below →
Last updated 2026-10-10
💡 Master tip
Build adjacent to opponents so you benefit from Trading house discounts and Power income. Staying completely isolated leaves you starved for resources.
Similar games
Ready for something heavier
If this one has gotten too easy, try these — same feel, one step up in weight.
Tools you can request
Not built yet. Let us know if you want one — it goes on the list.
Power Bowl cycle simulator
Automatically tracks Power moving through Bowls I/II/III and what you can spend
Faction ability and setup guide
A reminder of each of the 14 factions' passive abilities
Comments
Share your thoughts, report a mistake, or request a tool. No sign-in needed — nicknames are not verified, so anyone can use the same one.
Loading…