Top 31 · #22 of 40 in Strategy
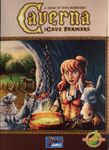
Caverna: The Cave Farmers
Billed as an official follow-up to Agricola, this large worker-placement game has you play a cave-dwelling dwarf who digs through the mountain to develop mines and clears the forest to build a farm. With no cards at all, you design your own growth path freely using only fixed Furnishing tiles.
Rules
Play dwarfs who clear the forest for farming and dig through the mountain to expand their caves in this large worker-placement game. Unlike Agricola, there is no hand of cards — you grow entirely by choosing from a shared pool of fixed Furnishing tiles.
Components
| Component | Count | Notes |
|---|---|---|
| Home boards | 7 | Forest on the left, Mountain on the right; one per player |
| Dwarf discs (per color) · Stables (per color) | 5 · 3 | Place 2 Dwarfs in the Entry-level dwelling to start |
| Sheep · Donkeys · Wild boar · Cattle · Dogs | ~35 · 30 · 30 · 30 · 20 | Farm animals live in pastures/stables; Dogs can go anywhere |
| Wood · Stone · Ore (black) · Rubies (red) | ~45 · 25 · 45 · 20 | Ore forges Weapons; Rubies are a wildcard resource |
| Grain · Vegetables | ~40 · 35 | Sown in Fields or consumed as Food |
| Gold coins (1, 2, 10) | 20 · 24 · 5 | Used to buy Food and tallied for scoring |
| Weapon strength markers | 52 | Values 1-14, kept once a Weapon is forged |
| Furnishing tiles | 17 (Dwellings) + 47 (others) | Fixed-ability tiles that fill cave spaces |
| Forest/Mountain tiles (single and twin) | ~100 | Meadows, Fields, Tunnels, Caverns, Mines, etc. |
| Action space cards | 12 (11 in the 2-player game) | One new card enters play per round across rounds 1-12 |
| Harvest markers | 7 | Placed face-down on rounds 6-12 — the face side shows a normal harvest or an event |
Setup
- 1Choose a color and take a Home board plus 5 Dwarfs and 3 Stables. Place 2 Dwarfs in the pre-printed "Entry-level dwelling" (2 cave spaces, room for up to a pair of animals). The remaining 3 Dwarfs and Stables stay in your personal supply.
- 2Randomly determine the starting player. The starting player and the player to their left take 1 Food, the third player takes 2, and everyone else takes 3 — later turn order means more starting Food.
- 3Attach the basic game board (1-3 or 4-7 player side) matching your player count, plus any additional boards needed for 3 or 5-7 players.
- 4Shuffle the 7 Harvest markers and place them face-down (grey rune side up) on round spaces 6 through 12. In the 2-player game, remove one green-leaf marker and leave round space 9 empty.
- 5Shuffle the 12 Action space cards. In the 2-player game, remove the "Exploration" card (with the Level 4 expedition) to use only 11. Stack the 3 stage-1 cards on top, followed by stage 2 (including round 4's "Wish for children"), then stage 3, then stage 4.
- 6Place the Furnishing supply boards near the Forest/Mountain tile stacks, and set out the sorted building materials, animals, gold coins, and Weapon strength markers.
Tiles, not cards, drive your growth
There is no hand of Minor improvements or Occupations like Agricola. Instead, you pick whatever Furnishing tile you want from the shared supply each time you build.
Round structure — 5 phases
Every round follows Add a new Action space → Replenish accumulating spaces → Work phase → Return home → Harvest time (if applicable). The base game runs 12 rounds (11 in the 2-player game).
- 1① New Action space: flip the top Action space card and place it on the lowest-numbered empty round space. From round 6 onward, also flip that round's Harvest marker face up.
- 2② Replenish accumulating spaces: refill every arrow-marked accumulating space with its listed goods, adding to whatever remains from the previous round.
- 3③ Work phase: starting with the first player and going clockwise, each player places 1 Dwarf at a time on an empty Action space and resolves it immediately — unarmed Dwarfs first, then armed ones in ascending Weapon strength.
- 4④ Return home: once all Dwarfs are placed, return them to their Dwellings. Since you can never have more Dwarfs than available room, there's always a spot.
- 5⑤ Harvest time (if applicable): resolve the Field phase, then the Feeding phase, then the Breeding phase.
Dwarf placement order is fixed
You must place your unarmed Dwarfs first, then your armed Dwarfs in ascending Weapon strength. Spending 1 Ruby lets you bypass this order for a specific Dwarf.
Clearing the forest vs. digging the mountain
Your Home board splits into a Forest on the left and a Mountain on the right. Clearing the Forest yields Meadows and Fields; digging the Mountain yields Tunnels, Caverns, and Mines — developing both sides together is the heart of Caverna.
| Side | Action spaces | What you get |
|---|---|---|
| Clearing the Forest | Clearing, Sustenance, Slash-and-burn | Meadow/Field twin tiles (a free bonus of the action) |
| Digging the Mountain | Excavation, Drift mining | Tunnel/Cavern twin tiles (a free bonus of the action) |
| Buying with Rubies | Any time | Single Field/Meadow tile (1 Ruby), single Tunnel tile (1 Ruby), single Cavern tile (2 Rubies) |
Your first tile must sit in front of the cave entrance
The first "Meadow/Field" tile you place in the Forest must go directly in front of your cave entrance. After that, each new tile must be adjacent to an existing one — the same applies to Mountain tiles and your existing cave system.
Furnishing tile structure
The "Furnish a cavern" action places 1 Furnishing tile on an empty cave space, paying its building cost (usually Wood and/or Stone). Each tile has its own unique ability; this guide covers only the structure, not every individual tile's effect.
| Category | Name tag color | Characteristics |
|---|---|---|
| Dwellings | Red | Provide extra room for Dwarfs — needed to grow your family up to 5 |
| Parlors/Storages/Chambers | Yellow | Grant bonus points or reduce penalties based on goods or animals you hold, during play or at game end |
| Other ordinary tiles | Default | Provide a fixed ability (resource production, one-time effects, etc.) with no scoring bonus |
Dwellings are plentiful; almost everything else is unique
Ordinary "Dwelling" tiles are numerous enough to treat as unlimited, but nearly every other Furnishing tile exists as only a single copy in the game. Whoever claims it first gets it.
Mining, Rubies, and raising animals
- 1Placing an "Ore mine/Deep tunnel" twin tile on 2 adjacent ordinary Tunnels (via "Ore mine construction") immediately grants 3 Ore.
- 2You may place a Ruby mine on a single empty Tunnel space (via "Ruby mine construction"). If that space happened to be a Deep tunnel, you immediately gain 1 Ruby — an ordinary Tunnel grants none.
- 3The "Ore mining" and "Ruby mining" Action spaces accumulate goods, and owning mines adds bonus amounts (1 extra Ore per Ore mine; 1 extra Ruby if you have 2+ Ruby mines, capped).
- 4Rubies are a wildcard resource. Exchange them 1:1 at any time for animals, building materials, Grain, Vegetables, or Gold (Cattle is the exception: 1 Ruby plus 1 Food), and also spend them on single Field/Meadow/Tunnel/Cavern tiles.
| Structure | Capacity | Notes |
|---|---|---|
| Small pasture (1 space) | Up to 2 of 1 animal type | 2 Wood to fence 1 Meadow space |
| Large pasture (2 spaces) | Up to 4 of 1 animal type | 4 Wood to fence 2 adjacent Meadow spaces at once |
| Pasture + Stable | Large pasture: up to 8 (16 with 2 Stables) | 1 Stone adds 1 Stable, doubling capacity |
| Forest Stable (standalone) | 1 Wild boar | Can be built even on an uncleared Forest space |
| Mine (Ore or Ruby) | 1 Donkey | Mine spaces hold only Donkeys |
| Dogs | +1 Sheep per Dog on a pasture | Dogs go anywhere and never breed |
No dedicated space for Wild boar or Cattle
Sheep and Donkeys accumulate on dedicated spaces, but Wild boar and Cattle only come from clearing Forest preserves, Ruby trades, or Expedition loot.
Forging Weapons and Expeditions
- 1On the "Blacksmithing" Action space, spend 1 to 8 Ore with an unarmed Dwarf to forge a Weapon of that same strength.
- 2An armed Dwarf can undertake an Expedition on an Expedition Action space, immediately or in a later round. Expeditions range from level 1 to 4 — higher levels let you choose more loot items.
- 3Each loot item on the Overview card lists a minimum Weapon strength; you may only pick items at or below your Dwarf's current Weapon strength.
- 4After an Expedition, that Dwarf's Weapon strength always increases by 1 (a newly forged Weapon is capped at strength 8, but Expeditions can push it past 8, up to the maximum of 14).
| Weapon strength (minimum) | Example loot |
|---|---|
| 1 | 1 Dog, 1 Wood, all Weapons +1 |
| 6 | 2 Gold |
| 7 | Furnish a cavern (free) |
| 8 | Cap on a newly forged Weapon's initial strength |
| 14 | Maximum possible Weapon strength |
This table is illustrative, not the full loot list
The actual Overview card lists many more items (animals, Furnishing tiles, building materials, and more) across every strength tier. This table shows the structure; consult the card itself for the exact list.
Harvest — Field, then Feeding, then Breeding
- 1Field phase: take 1 Grain or Vegetable token from each sown Field into your personal supply.
- 2Feeding phase: pay 2 Food per Dwarf in your cave (newborns from this round need only 1). Convert animals, crops, Rubies, or Gold into Food as needed; take Begging markers for any shortfall.
- 3Breeding phase: with at least 2 Farm animals of the same type, gain 1 offspring of that type if you can house it. Dogs never breed.
- 4Rounds 1-4 have only 1 harvest, at the end of round 3; round 4 instead requires paying 1 Food per Dwarf with no harvest. Rounds 5-12 normally end with a harvest, but a revealed question-mark Harvest marker (on rounds 6-12) changes that round instead (see the Harvest events card).
Begging markers cost -3 points each, too
A shortfall gives you 1 Begging marker per missing Food. Each is worth -3 points at the end of the game and cannot be removed — the same penalty structure as Agricola.
Final scoring
| Category | Scoring |
|---|---|
| Farm animals + Dogs | 1 Gold each |
| Missing Farm animal types | -2 Gold per missing type (Sheep/Donkey/Wild boar/Cattle, if you have none) |
| Grain | Count ÷ 2, rounded up |
| Vegetables | 1 Gold each |
| Rubies | 1 Gold each |
| Dwarfs | 1 Gold each |
| Unused Home board spaces | -1 each (the 2 pre-printed Caverns always count as used, even unfurnished) |
| Furnishing tiles, Pastures, Mines | As printed (Small pasture 2, Large pasture 4, Ore mine 3, Ruby mine 4) |
| Parlor/Storage/Chamber bonuses | Extra points per tile condition (recorded on separate lines) |
| Gold coins | Face value, summed |
| Begging markers | -3 each |
Simple counts, heavier resource income
Animals, Dwarfs, Rubies, and Vegetables score a flat 1 point each, but Grain scores only 1 point per 2 (rounded up). Gold coins and Furnishing/pasture/mine points make up a large share of the final total.
End of the game
The base game ends after round 12 (round 11 in the 2-player game). Once the final round is complete, move straight to final scoring — the player with the most Gold points wins, with ties sharing the win.
Strategy tips
- Rather than committing entirely to clearing or digging, it's safer to cover your minimum food needs on both sides of the board.
- Expeditions are more valuable the fewer players pursue Weapons — going alone for Weapons when everyone else stays peaceful (or vice versa) tends to pay off.
- Since Rubies can be spent any time as a wildcard, save them for urgent resource needs or for reordering your Dwarf placement.
- Most Furnishing tiles beyond ordinary Dwellings are one-of-a-kind, so grab a tile you really need before someone else does.
- Every unused Home board space costs a point, so avoid leaving Forest or Mountain spaces empty for the whole game.
Player-count variants and editions
Caverna supports 1-7 players, with different combinations of basic and additional game boards by player count. The rulebook recommends capping your first game at 5 players to reduce downtime.
- Solo game: cover part of the 2-player board with Overview cards and play alone. You start with 2 Food, every round from round 5 onward ends with a harvest, and there are no Harvest events. The suggested target is a "magical score" of 100 points.
- The 2-player game removes the "Exploration" Action space card (with the level 4 Expedition) to use only 11 cards, and skips round 9 entirely. Ruby mining also only becomes available from round 3.
- The 2018 expansion Caverna: The Forgotten Folk (originally a fan project before becoming an official expansion) is distributed in Korea through Korea Boardgames. This guide covers only the base game, without that expansion.
"Cave vs Cave" is a separate 2-player-only game
The 2017 title Caverna: Cave vs Cave simplifies Caverna into a standalone 2-player game. It is a different game entirely — don't mix its components, rules, or scoring with this guide.
Frequently confused rules
Q. Is there a hand of cards like Agricola's Occupations or Minor improvements?
No. Instead of a hand of cards, Caverna has you pick whatever Furnishing tile you need from a shared supply each time you build.
Q. Does placing a Ruby mine on any Tunnel immediately give me a Ruby?
No. You only get an immediate Ruby if that Tunnel space happened to be a Deep tunnel. Placing it on an ordinary Tunnel gives you the mine tile but no Ruby.
Q. Can I place my Dwarfs in any order I like?
No. You must place unarmed Dwarfs first, then armed Dwarfs in ascending Weapon strength. Spending 1 Ruby lets you place a specific Dwarf out of that order.
Q. Does every round end with a harvest?
No. Rounds 1 and 2 have no harvest at all, and round 4 requires paying 1 Food per Dwarf instead of a harvest. From round 6 to 12, a revealed question-mark Harvest marker can skip the harvest, replace it with a flat Food payment, or force a choice between the Field and Breeding phases.
Q. Is a Donkey always worth exactly 1 Food?
A single Donkey converts to 1 Food, but 2 Donkeys together convert to 3 Food — it isn't simply the count multiplied, so watch this exception when calculating Food.
Q. Do unfurnished Caverns count as unused spaces for scoring?
No. The 2 pre-printed Caverns always count as used, even without a Furnishing tile. Only Home board spaces outside those 2 that still hold no tile at all are penalized.
History and editions
Caverna was designed by Uwe Rosenberg and published by Lookout Games in 2013. Often described as a spiritual successor to Agricola, it's known for feeling like more of a sandbox thanks to its fixed Furnishing tiles replacing a hand of cards.
A simplified 2-player-only spin-off, Caverna: Cave vs Cave, followed in 2017, and the expansion Caverna: The Forgotten Folk — which began as a fan project before becoming an official design by Alex Wilber and Uwe Rosenberg — released in 2018.
Namuwiki's article on Caverna reports that Korea Boardgames published a Korean edition through crowdfunding in early 2015, which sold out before being reprinted in 2021 alongside The Forgotten Folk expansion. A Danawa price-comparison listing separately confirmed a Korea Boardgames "Caverna: The Forgotten Folk" expansion set, though neither source led to an official Korean rulebook PDF.
Sources
Lookout Games — Caverna: The Cave Farmers official English Rules of PlayLookout Games — Caverna: The Cave Farmers official English AppendixWiki cross-check — English Wikipedia: Caverna (board game)Wiki cross-check — Namuwiki: Caverna (Korean)Danawa price comparison — confirmed listing for the Korea Boardgames "Caverna: The Forgotten Folk" expansion setRule summaries are reference content written by us, not quotations from the official rulebook. Always check the official rulebook for exact rules. Diagrams are original schematics, not rulebook illustrations.
Spotted a mistake? Tell us in the comments below →
Last updated 2026-10-11
💡 Master tip
Sending a dwarf with a high Weapon strength on an Expedition lets you sweep up resources, animals, and Furnishing tiles all at once, dramatically speeding up your farm's growth. Early on, invest in growing your number of dwarfs so you have more action options later in the game.
Similar games
Ready for something heavier
If this one has gotten too easy, try these — same feel, one step up in weight.
Tools you can request
Not built yet. Let us know if you want one — it goes on the list.
Cave Furnishing Tile Search Engine
Search Furnishing tile abilities and scoring values by category
Harvest & Expedition Reward Settlement Sheet
Automatically calculates resource rewards by dwarf Weapon strength
Comments
Share your thoughts, report a mistake, or request a tool. No sign-in needed — nicknames are not verified, so anyone can use the same one.
Loading…