Top 10 · #7 of 40 in Strategy
Gaia Project
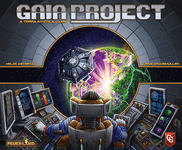
A leading euro strategy game where you take one of 14 different factions and transform planets across space while developing your research. It is the science fiction remake of Terra Mystica, and the asymmetric faction powers and the modular board call for a different strategy every game.
Rules
A heavy euro where you take one of 14 factions, terraform planets so your own species can live on them, and build over six rounds. It is the science fiction successor to Terra Mystica, and the way power tokens cycle through three areas sets the pace of the whole game.
What makes this game its own thing
The title is the rule. Only one of the ten planet types is habitable to your faction, and every other planet has to be terraformed — paid for in ore — a number of steps toward your own type before you can put a mine on it. The first question is not where to build but what you are able to turn into your own ground.
The second axis is power. Power tokens are never destroyed; they travel area I → area II → area III, and the only power you can spend is what sits in area III. Spending it drops it back to area I, two moves from being useful again. So the question is not «how much power do I have» but «when does it reach area III».
Three axes feed each other
① Terraforming eats ore and buys you ground. ② Research eats knowledge and lowers the cost of terraforming, range and Gaia projects. ③ Power charges faster the closer you build to opponents, and that power buys actions. Push only one and the other two seize up.
- The game is exactly six rounds. Each round has its own scoring tile, so the same action is worth a different amount depending on when you take it.
- Building next to an opponent pays them. Anyone with a structure nearby spends VP to charge power — distance, not attack, is the whole of the interaction.
- There is almost no luck. No dice, no card draws. The randomness is in the board layout and in which tech tiles and scoring tiles come out at setup.
Components
| Component | Count | Notes |
|---|---|---|
| Space sector tiles | 10 | Numbered 01–10. Tiles 05, 06 and 07 are double-sided and you pick the side by player count |
| Faction boards | 7 (double-sided) | A different faction on each side — which is why there are 14 factions |
| Research board / scoring board | 1 each | Six research areas / round scoring, final scoring and ranking tracks |
| Round scoring tiles | 10 | Six of them are placed, one per round |
| Final scoring tiles | 6 | Two are used |
| Round boosters | 10 | Only player count + 3 are used (seven in a 4-player game) |
| Standard / advanced tech tiles | 36 / 15 | Standard is 9 types × 4; only six advanced tiles are laid out |
| Federation tokens | 19 | Five types with 3 copies plus four with 1 copy (the 12 VP token is gray on both sides) |
| Gaia Planet tokens / Lost Planet token | 12 / 1 | Cover a Transdim Planet to turn it into a Gaia Planet / appears at Navigation level 5 |
| Power tokens / brainstone | 50 / 1 | The brainstone is the Taklons' — it counts as one token but can be spent as three power |
| Q.I.C. (Quantum Intelligence Cubes) | 30 | Extra range, tech tiles, and the cost of certain actions |
| Structures per player | 8 mines · 4 trading stations · 3 research labs · 1 planetary institute · 2 academies | They only ever leave the faction board — nothing comes back |
| Other pieces per player | 3 Gaiaformers · 25 satellites · 7 player tokens · 15 record tokens (shared) | Six player tokens for research, one for VP |
| Space stations | 6 | Ivits only |
About the planet colors in these diagrams
The official English rulebook names only four planet colors: Transdim (purple), Gaia (green), Oxide (red) and Titanium (gray). The colors of the other three are ⚠️ unconfirmed, so this guide picked them only to tell the types apart — they may differ from the real components.
Setup
- 1Assemble the board. With 3–4 players use all 10 sector tiles with 05, 06 and 07 solid-side up; with 1–2 players use only 01–07 with 05, 06 and 07 outlined-side up.
- 2Place the research board. Deal the nine standard tech tiles with green marks face up onto the tech spaces at random, then stack the rest on their matching tiles to make nine piles of four. Put one advanced tech tile at random on each of the six spaces between levels 4 and 5.
- 3Federation tokens. Set the Gleens' token aside, draw one of the rest at random and place it on level 5 of the «Terraforming» track. Stack the remainder by type, green side up.
- 4Scoring board. Deal six round scoring tiles and two final scoring tiles at random.
- 5Round boosters. Take out player count + 3 and set them beside the board.
- 6Choose factions and set your starting resources, starting power and starting Q.I.C. exactly as your faction board shows. If the board marks level 1 of a research area, advance there and take the one-time bonus immediately.
- 7Place your six research tokens on level 0 of each area and your VP marker on 10. Put one satellite on the 0 space of each ranking track.
- 8Place your starting mines. For a first game, use the diagram in the rulebook; afterwards the first player places one mine, then in reverse order everyone places a second one, each on a home planet of their own type.
- 9Choose your first round booster, starting with the last player and going counterclockwise.
Placing a starting mine sets your income
Mines come off your faction board from the left, and the income icon revealed under each one is income you collect every round. So it is not only where you place them but how many have left the board.
A neutral player joins 1–2 player games
Put two satellites of an unused color on the ranking tracks; the number on each final scoring tile sets their position. During final scoring they occupy a rank of their own.
The four phases of a round
- 1Phase I — Income. Collect from your faction board, round booster, tech tiles and current research levels. Take one source's income all at once; you choose the order between sources.
- 2Phase II — Gaia. Move power tokens from your Gaia area back to area I (the Terrans go to area II). Any Transdim Planet with one of your Gaiaformers on it becomes a Gaia Planet.
- 3Phase III — Actions. Starting with the first player and going clockwise, one action per turn. A player who has passed takes no more turns. The phase ends when everyone has passed.
- 4Phase IV — Clean-up. Remove all action tokens, flip the round boosters face up and return this round's scoring tile to the box. In round 6 you skip this phase and go straight to final scoring.
| Action (one per turn) | In short |
|---|---|
| 1. Build a mine | Place a mine on an empty planet — it has to pass range and terraforming |
| 2. Start a Gaia project | Send a Gaiaformer to a Transdim Planet |
| 3. Upgrade a structure | Mine → trading station → research lab / planetary institute → academy |
| 4. Form a federation | Connect your structures worth 7+ power value using satellites |
| 5. Research progress | Spend 4 knowledge to advance one track by one level |
| 6. Power and Q.I.C. actions | The shared spaces below the research board — once each per round |
| 7. Special actions | The orange spaces on faction boards, tech tiles and boosters — no cost |
| 8. Pass | Swap your round booster and end your round |
Free actions and the passive action are not turns
Free actions (resource exchanges) happen on your turn, immediately before or after your action — never in the middle of one. Charging power, by contrast, happens on someone else's turn and costs you no turn at all.
The power cycle — the part that trips everyone up
Power tokens cycle rather than disappear. Your faction board has areas I, II and III plus the green Gaia area to their left. The only power you can spend sits in area III, and spending it sends it back to area I.
- **Charge** — push one token from area I to II, or from area II to III
- **Spend** — move a token from area III back to area I. Only area III counts
- **Gain** — take a new token from the supply into area I
- **Gaia project** — move the required power into the Gaia area
- **Gaia phase** — the Gaia area empties back into area I (area II for the Terrans)
Charging follows a fixed order
① If area I has a token, move one from area I to area II. ② If area I is empty, move one from area II to area III. ③ If areas I and II are both empty you cannot charge — the rest of the charge is simply lost.
| Wording | What happens | Total tokens |
|---|---|---|
| Charge | Push one step along I → II → III | unchanged |
| Spend | Area III → area I | unchanged |
| Gain | Supply → area I | increases |
| Discard | From any area back to the supply (never the Gaia area) | decreases |
Forcing the cycle with a free action
There is a free action that discards one token from area II to move another token from area II to area III. You lose a token permanently to skip a lap, so save it for the endgame or a real emergency. You may take it even with tokens still in area I.
Building a mine — range and terraforming
A mine costs 2 credits and 1 ore. Before that, three things must be true: the planet is empty, it is within your range, and it is habitable to you. Miss any one and you cannot take the action at all — there is no «terraform now, build later».
- 1Count the range. Take the shortest path from one of your colonized planets to the target; the path may cross other planets. That distance must not exceed your range.
- 2Buy more range if you need it. Each Q.I.C. you spend adds 2 to your range, and you may spend as many as you like.
- 3Make it habitable. The seven colored types cost ore per terraforming step; a Gaia Planet costs 1 Q.I.C.; a Transdim Planet cannot be built on at all.
- 4Pay every cost immediately and take the leftmost mine from your faction board.
| Navigation level | Basic range |
|---|---|
| Level 0 · 1 | 1 |
| Level 2 · 3 | 2 |
| Level 4 | 3 |
| Level 5 | 4 (and you place the Lost Planet token) |
How many terraforming steps a planet needs depends on how far its type is from your home type. Your faction board shows 1, 2 or 3 steps for every planet type, and the ore you pay per step is set by your Terraforming research level.
| Terraforming level | Ore per step |
|---|---|
| Level 0 · 1 | 3 |
| Level 2 | 2 |
| Level 3 · 4 · 5 | 1 |
Unused free steps are lost
Take the power action for two free terraforming steps on a planet that needs only one and the second step is wasted. In the other direction you may pay ore to add steps when the free ones are not enough.
Gaia projects and Transdim Planets
Nobody can build directly on a purple Transdim Planet. You send a Gaiaformer to turn it into a Gaia Planet first, and that finishes during the Gaia phase of the following round — so it always costs you at least one round of waiting.
| Gaia Project level | Cost per project | Also |
|---|---|---|
| Level 0 | — (cannot start one) | no effect |
| Level 1 | 6 power | gain your first Gaiaformer |
| Level 2 | 6 power | gain 3 power tokens immediately |
| Level 3 | 4 power | gain a second Gaiaformer |
| Level 4 | 3 power | gain a third Gaiaformer |
| Level 5 | 3 power | 4 VP plus 1 VP per Gaia Planet with a structure of yours |
This power is not «spent»
Power paid for a Gaia project goes to the Gaia area, not to area I. It only returns to area I in the following Gaia phase, which means it is locked up for a whole round. That is the real reason Gaia projects feel expensive.
- A Transdim Planet with a Gaiaformer on it can only ever be colonized by that Gaiaformer's owner, and it counts as accessible to them.
- When you build a mine on a Gaia Planet holding your own Gaiaformer you do not pay the Q.I.C. — pay only the mine and return the Gaiaformer to your board.
- While the Gaiaformer sits there the planet is not colonized by you — you cannot measure range from it.
- A Gaia project started in round 6 never completes, because there is no round 7.
Upgrading structures and gaining tech tiles
The mine is the only structure you place on an empty planet; everything else replaces a structure already on the board, one step at a time.
Trading stations are nearly half price next to a neighbor
If at least one opponent structure is within 2 spaces of your mine, upgrading it to a trading station costs 3 credits instead of 6. That is why crowding an opponent is not purely a cost.
- An academy comes in two flavors. One gives you 2 knowledge of income every round; the other gives you an action space that produces a Q.I.C.
- Gaining a tech tile lets you advance one research area. Take one of the six tiles directly under an area and you may only advance that area; take one from the lower row of three and you may advance any area.
- You can never own two copies of the same standard tech tile — one buried under an advanced tile still counts as owned.
- An advanced tech tile needs three things at once: your token on level 4 or 5 of that area, a federation token flipped from green to gray, and an uncovered standard tile to place it on. Advanced tiles are never replenished, so only six exist per game.
Neighbors charge power when you build (the passive action)
Every time anyone builds a mine or upgrades a structure, each other player with a structure within 2 spaces may spend VP to charge power. It happens outside your turn, and even a player who has already passed can do it.
| Power charged | VP spent |
|---|---|
| 1 | 0 |
| 2 | 1 |
| 3 | 2 |
| 4 | 3 |
- With several of your structures in range, only the highest power value counts. In the figure that is the planetary institute (3), so it is «spend 2 VP, charge 3».
- It is all or nothing, with exactly two exceptions — when areas I and II do not hold enough tokens to move, and when you do not have enough VP. Then you charge as much as you can and pay accordingly.
- The player who built or upgraded must point out who can charge. Players then decide clockwise from that player.
- Mines placed during setup do not let anyone charge.
Forming a federation
Connect planets you have colonized so that their structures total a power value of at least 7 and you form a federation: take any federation token from the supply and immediately gain the VP and resources shown on it.
| Structure | Power value |
|---|---|
| Mine | 1 |
| Trading station · research lab | 2 |
| Planetary institute · academy | 3 |
- 1Adjacent colonized planets are already connected. Anything further apart has to be linked with satellites.
- 2Each satellite costs you one discarded power token (gone to the supply for good). Satellites go only on spaces without a planet.
- 3You must make all the connections within a single action.
- 4If you built no satellites at all, put a record token on any planet in the federation to mark it.
Nothing may be superfluous
If the federation would still be valid with one fewer planet and one fewer satellite, it is not allowed. Going over 7 power value is fine in itself — a version that adds a mine for a total of 8 is allowed as long as it needs the same number of satellites.
- Each planet and satellite belongs to only one federation. Colonizing next to an existing federation just enlarges it and gains you nothing.
- Federation tokens arrive green side up. Flipping one to its gray side is what pays for an advanced tech tile or a move to level 5 of a research area.
- The 12 VP federation token is gray on both sides, so it can never be used as a flip.
- You may form any number of federations (except as the Ivits, who grow one federation for the whole game).
The six research areas
Spend 4 knowledge to advance one area by one level. There are six areas and levels 0 to 5. Only the level you are standing on has an effect — the levels you passed leave nothing behind.
| Research area | What improves | At level 5 |
|---|---|---|
| Terraforming | Ore per step goes 3 → 2 → 1 | Take the federation token placed here (it counts as forming a federation) |
| Navigation | Basic range goes 1 → 2 → 3 → 4 | Place the Lost Planet token on an accessible empty space (it counts as building a mine) |
| Artificial Intelligence | Q.I.C. at every level (1 · 1 · 2 · 2 · 4) | 4 Q.I.C. |
| Gaia Project | Project cost 6 → 4 → 3 power, and up to three Gaiaformers | 4 VP plus 1 VP per Gaia Planet with a structure of yours |
| Economy | Ore, credits and charged power every income phase | Immediately 3 ore, 6 credits and charge 6 — the level 4 income stops |
| Science | Knowledge income goes 1 → 2 → 3 → 4 | Immediately 9 knowledge — the level 4 income stops |
- You gain 3 power crossing from level 2 to level 3, including when a tech tile moves you.
- Reaching level 5 also costs a federation token flipped from green to gray, on top of the 4 knowledge.
- Only one player may reach level 5 of each area.
- Levels 5 of Economy and Science are one-time payouts that cancel the level 4 income. They are endgame moves, not opening ones.
The remaining actions — power, Q.I.C., special, free and pass
- Power actions (purple) and Q.I.C. actions (green) sit on the research board and are shared by everyone. Pay the power or Q.I.C. shown and resolve the effect. Each space works once per round, and whoever takes it covers it with an action token.
- Those shared spaces give 2–3 knowledge, 2 ore, 7 credits or 2 power tokens; one or two free terraforming steps; a tech tile; scoring one of your federation tokens a second time; or 3 VP plus 1 VP per different planet type you have colonized.
- Special actions (orange) appear on faction boards, tech tiles and round boosters and belong only to their owner. They are free and usable once per round, and a special action cannot be combined with another special, power or Q.I.C. action.
- Free actions may be taken as often as you can afford on your turn: 4 power → 1 Q.I.C., 3 power → 1 ore, 1 Q.I.C. → 1 ore, 4 power → 1 knowledge, 1 power → 1 credit, 1 knowledge → 1 credit, 1 ore → 1 credit, 1 ore → 1 power (into area I). Plus discard a token from area II to move another from area II to area III.
- Pass by taking one of the available round boosters — including one returned this round — and handing back the one you were using. You cannot keep the same booster two rounds running. In round 6 you only return yours.
- The first player to pass in a round takes the first player marker.
After passing you cannot even take free actions
Passing is an action, so free actions are allowed right before you pass but not after. Finish any resource conversions before you declare the pass.
| Resource | Maximum |
|---|---|
| Ore | 15 |
| Knowledge | 15 |
| Credits | 30 (two markers × 15) |
Scoring — four sources
VP comes in during the game and again at the end. Your VP marker starts on 10, because charging power costs VP.
| Round scoring tile (that round only) | VP |
|---|---|
| Each mine you build | +2 |
| Each upgrade to a trading station | +3 or +4 (depending on the tile) |
| Each upgrade to an academy or planetary institute | +5 |
| Each mine you build on a Gaia Planet | +3 or +4 (depending on the tile) |
| Each research advance | +2 |
| Each federation token gained | +5 |
| Each terraforming step you take | +2 |
| Final scoring tile (two are used) | What it counts |
|---|---|
| Structures that are part of federations | the Lost Planet's mine counts |
| Structures in total | the Lost Planet's mine counts |
| Different planet types colonized | Gaia Planets and the Lost Planet each count as a type |
| Gaia Planets colonized | — |
| Sectors colonized | at least one structure per sector |
| Satellites built | the Ivits' space stations count as satellites |
- Ranking rewards: 18 VP for first, 12 for second, 6 for third, 0 for fourth. Tied players add the ranks they share and split the total evenly (a tie for first splits 30 into 15 each).
- Research scoring: 4 VP for each of levels 3, 4 and 5 you reached or passed, in every one of the six areas.
- Resource scoring: 1 VP for every 3 ore, knowledge or credits left over, in any combination.
- Federation tokens and tech tiles also give VP — tokens the moment you take them, tech tiles whenever their condition fires or whenever you pass.
Game end and winner
The game ends when round 6's action phase ends. You skip the clean-up phase and go straight to final scoring. Most VP wins, and tied players share the victory.
- A Gaia project started in round 6 never completes — there is no round 7.
- When you pass in round 6 you only return your booster and take no new one. Any effect that triggers on returning it (VP per mine, and so on) still happens.
- In the last round, rounding your leftover resources to a multiple of 3 is real points: 4 left over is 1 VP, 6 is 2 VP.
The 14 factions — home planet and abilities
Seven faction boards with a different faction on each side make 14. The two factions on one board share a home planet type.
| Faction | Home planet | Ability / planetary institute |
|---|---|---|
| Terrans | Terra | Gaia area power returns to area II / and as it does you may gain resources as if spending that much power on free actions |
| Lantids | Terra | May build mines on planets an opponent has colonized (no terraforming, cannot be upgraded) / 2 knowledge each time you do |
| Xenos | Desert | Place a third starting mine / federations need only power value 6, and income gives a Q.I.C. instead of a power token |
| Gleens | Desert | Gain ore wherever you would gain Q.I.C. (until the right academy); Gaia Planets cost 1 ore; +2 VP per mine on a Gaia Planet / upgrading grants their own federation token |
| Taklons | Swamp | The brainstone counts as one token but spends as three power / gain an extra power token every time you charge from the passive action |
| Ambas | Swamp | — / once per round, as an action, swap your planetary institute with one of your mines |
| Hadsch Hallas | Oxide | — / spend credits instead of power on free actions that gain resources |
| Ivits | Oxide | No starting mines — place your planetary institute last instead. One federation for the whole game, grown to earn more tokens / a special action places a space station |
| Geodens | Volcanic | — / 3 knowledge the first time you mine each planet type |
| Bal T'aks | Volcanic | Cannot advance Navigation. Send a Gaiaformer to the Gaia area for 1 Q.I.C. instead / the institute lifts the Navigation ban |
| Firaks | Titanium | — / as an action, downgrade a research lab to a trading station and advance one research level |
| Bescods | Titanium | Institute and academy positions are swapped. Once per round, as an action, advance your lowest research token for free / structures on gray (home) planets get +1 power value |
| Nevlas | Ice | Free action: move an area III token to the Gaia area for 1 knowledge / spend area III tokens as 2 power each |
| Itars | Ice | Tokens discarded from area II to charge go to the Gaia area instead of the supply / in the Gaia phase, discard 4 tokens from the Gaia area for a tech tile |
The rulebook's first-game line-ups
2 players Hadsch Hallas and Xenos; 3 players Terrans, Taklons and Geodens; 4 players Terrans, Hadsch Hallas, Xenos and Taklons. Factions that bend the rules, like the Ivits and Lantids, are better saved for a second game.
Strategy that falls straight out of the rules
- Terraforming level 3 and Navigation level 2 are the first goals. They cut ore per step from 3 to 1 and push range from 1 to 2. Without them you simply have nowhere to build.
- Building within 2 spaces of an opponent usually pays. Your trading station upgrade drops from 6 credits to 3 and you charge power every time they build. It works both ways, so whoever builds there first wins the exchange.
- Power is about reaching area III, not about totals. A token gained into area I is two laps from being spendable; when you are in a hurry, a booster or the Economy track that charges is worth more.
- Aim federations at exactly 7. Anything superfluous is illegal anyway, and every satellite costs a power token forever. A planetary institute (3) in the middle makes the remaining 2 + 2 easy to find.
- Federation tokens are also flips. An advanced tech tile costs one and level 5 costs one. Cash them all for VP and your research stalls late.
- Read the round scoring tiles in advance — all six are open from the start. Building mines during the trading-station round quietly costs you 3–4 VP a turn.
- Economy and Science level 5 are for the last two rounds. The payout is big but it kills the level 4 income, so climbing there in rounds 1–3 loses ground.
Advanced setup, solo and expansion
- Advanced setup — instead of picking from a list, the first player takes any faction board and chooses one of its two sides. Starting mines are placed freely too: one each clockwise, then a second each counterclockwise.
- Variable board — shuffle the sector tiles. Three methods are offered (keep 01–04 fixed, randomize 01–04 as well, or randomize everything), and two planets of the same type may never be adjacent.
- Variable turn order — use the turn order card. The order you pass in sets the next round's order, and the card alternates sides each round.
- Smaller 3-player board — you may leave out sectors 09 and 10.
- Solo play — the Automa rulebook and Automa cards are in the base box. With two or more players, put the Automa cards and player aid back in the box.
- Gaia Project: The Lost Fleet is a separate expansion product. This guide covers the base game only.
A note on the Korean edition's terminology
This guide was cross-checked against the official English rulebook only. The Korean edition published by Boardpia (DiceTree Games) may use different terms. We will align them once a Korean rulebook can be obtained.
Rules people get wrong
Q. I have 8 power tokens. Why can I not take an action that costs 6 power?
Because only tokens in area III can be spent. However many sit in areas I and II, they do nothing for a cost. Charge first to push them up to area III.
Q. When does power paid for a Gaia project come back?
In the following round's Gaia phase, when the Gaia area empties into area I (area II for the Terrans). It is tied up for a whole round. That is the difference from spending: spent power lands in area I immediately and can start charging again.
Q. Can I terraform now and build the mine next turn?
No. Terraforming is part of the «Build a Mine» action, so both happen inside one action. If you cannot pay every cost at once, you cannot take the action at all.
Q. Can I charge only part of the power an opponent's build offers?
Normally it is all or nothing. There are exactly two exceptions — when areas I and II do not hold enough tokens to move them all, and when you cannot afford the VP. Then you charge what you can and pay for exactly that.
Q. If I colonize next to an existing federation, does the federation grow?
It gets bigger on the board but gains you nothing — no new token, no VP. To earn another token you need a new federation built from planets and satellites not adjacent to the old one. The Ivits are the exception: they grow one federation to earn further tokens.
Q. Is 4 knowledge all I need to reach level 5 of a research area?
No. On top of the 4 knowledge you must flip a federation token from green to gray. And only one player can reach level 5 of each area, so once someone gets there that space is closed for good.
Q. Can I replace an advanced tech tile with a different advanced tile?
No. An advanced tile may only be placed on an uncovered standard tile, and a standard tile can hold exactly one advanced tile. A covered standard tile loses its effect but still counts as owned, so you cannot take a second copy of it.
History and editions
- Designed by Helge Ostertag and Jens Drögemüller and published in 2017 by Feuerland Spiele in Germany, with illustration and graphic design by Dennis Lohausen.
- It is the science fiction successor to Terra Mystica (2012). The same two designers kept the skeleton — 14 factions, terraforming, three power areas, six rounds — and moved the stage from a single continent to a galaxy, adding a modular hex board, Gaia Planets and Q.I.C.
- The English edition is distributed by Z-Man Games; the rulebook's copyright page carries both Feuerland and Z-Man.
- The Korean edition was published by Boardpia, under the DiceTree Games brand, and went on sale domestically in December 2017. A later printing exists, though ⚠️ its current availability is unconfirmed.
- An expansion, Gaia Project: The Lost Fleet, is available. This guide covers the base game.
- Terra Mystica, the predecessor, won the 2013 Deutscher Spiele Preis and an International Gamers Award. A standalone successor in the same family, Age of Innovation, followed in 2023.
Sources
Official Feuerland Spiele rulebook (English, 24 pages)DiceTree Games (Boardpia) — publisher of the Korean editionCross-checked against Wikipedia: Terra Mystica (the Gaia Project article is merged into it)Cross-checked against Namuwiki: Gaia Project (Korean)Rule summaries are reference content written by us, not quotations from the official rulebook. Always check the official rulebook for exact rules. Diagrams are original schematics, not rulebook illustrations.
Spotted a mistake? Tell us in the comments below →
Last updated 2026-09-14
💡 Master tip
Push your research tracks up early (Gaia Project and Navigation especially) to expand faster, and work out the requirements for forming a federation in advance. If you neglect your power cycle your late-game actions get badly limited, so keep checking your power bowls every round.
Similar games
Tools you can request
Not built yet. Let us know if you want one — it goes on the list.
Counts include public tool requests only, excluding repeats from the same browser. These are not signed-in people counts: other devices or cleared cookies can be counted again.
Power cycle simulator
Automatic checking of conversion between power areas 1/2/3 and of power spending.
Comments
Share your thoughts, report a mistake, or request a tool. No sign-in needed — nicknames are not verified, so anyone can use the same one.
Loading…